Setting Up Your Development Environment
The following guide will take you through setting up an appropriate development environment on your local machine so you can work with Tari’s various projects. We’ll use Tari Universe as the project example to cover elements such as forking and cloning, but you should be able to apply this to any of the Tari projects.
In this guide, we’ll cover:
- Setting up a GitHub account
- Installing VS Code as your integrated development environment (IDE)
- Installing development prerequisites (Git, Rust and nvm)
- Setting up your credentials to easily work in GitHub using SSH
- Forking a repository you are interested in contributing to
- Cloning the repository on your local machine
Step 1 - Create your GitHub account
If you already have a GitHub account, you can skip this step. To sign up to GitHub, follow the instructions provided at GitHub’s documentation site.
While the steps may vary over time, you will need to perform the following actions:
- Provide your desired username, password, and email address
- Verify your email address
Once you’re done, you’ll be redirected to the GitHub dashboard.
A useful introduction to basic development concepts is the Hello World tutorial provided by GitHub. This tutorial introduces new users to the basics of development within GitHub and covers basic concepts such as repos, branches, commits, and more.
Step 2 - Installing your IDE
An IDE is a software application that provides various tools and functions for editing code and managing development projects. There are many different IDEs available for use, but we will be using VS Code for the guide.
Rather than explain the exact process for installing VS Code, it is best to follow the official instructions for installing VS Code, as the installation steps may change over time and differ for different environments.
Use one of the following links below, depending on your operating system, to install VS Code: Linux: https://code.visualstudio.com/docs/setup/linux MacOS: https://code.visualstudio.com/docs/setup/mac Windows: https://code.visualstudio.com/docs/setup/windows
Follow the instructions, then launch VS Code to confirm it’s working as intended. Next, we’ll install the prerequisites for working on Tari projects.
Step 3 - Installing Development Prerequisites
While an IDE is generally the only thing you would require if you were programming your own small projects, modern development environments rely heavily on several applications and services that improves the overall process of development:
Below we’ve listed several items which will be useful to have when working with Tari projects.
- Git
- Nvm (for Node.js and npm).
- MacOS: Homebrew.
- Rust language
- Protocol Buffers
- Cmake and make
- OpenSSL
- [Perl]https://learn.perl.org/installing/
- LLVM
- Tor (Optional)
It’s best to follow the official instructions for installing these items. We’ve linked to each one’s current installation page as a quick reference. Also note that you might already have some of these prerequisites installed. You can also review the Tari home page for additional requirements
:bulb: Tip: Check each project’s page for the command to check the version - this is usually the quickest method to find out if the application is installed or not.
:bulb: Tip: Note that there is a distinction between installing things globally and locally. The above projects are generally fine to install on a global level. However, project dependencies are a different story - if you are working with two repos, and both use a different version of a dependency, there’s usually no way to cleanly install a global version for both. That’s where package managers like npm come in to handle local dependencies on a case-by-case basis.
Step 4 - Setting up your GitHub access in VS Code
To simplify the process of working with your GitHub repositories, the typical means for doing so is via GPG and SSH. SSH is primarily used for authenticating while GPG is used for signing your commits - in other words, when you make changes, you’ll be signing them so others can confirm it’s actually you making the changes.
These are the preferred method for committing code to the Tari repos. Both SSH and GPG work by generating a private and public key that can then be used to interact securely with GitHub.
- To set up SSH, you should refer to the following guide
- To set up GPG, you should refer to this guide
Step 5 - Forking the Tari Universe repo
Next, we will fork the Tari Universe repo. Forking allows you to create your copy of the Tari Universe codebase, independent of the original project. This will allow you to safely modify the codebase without impacting the main project.
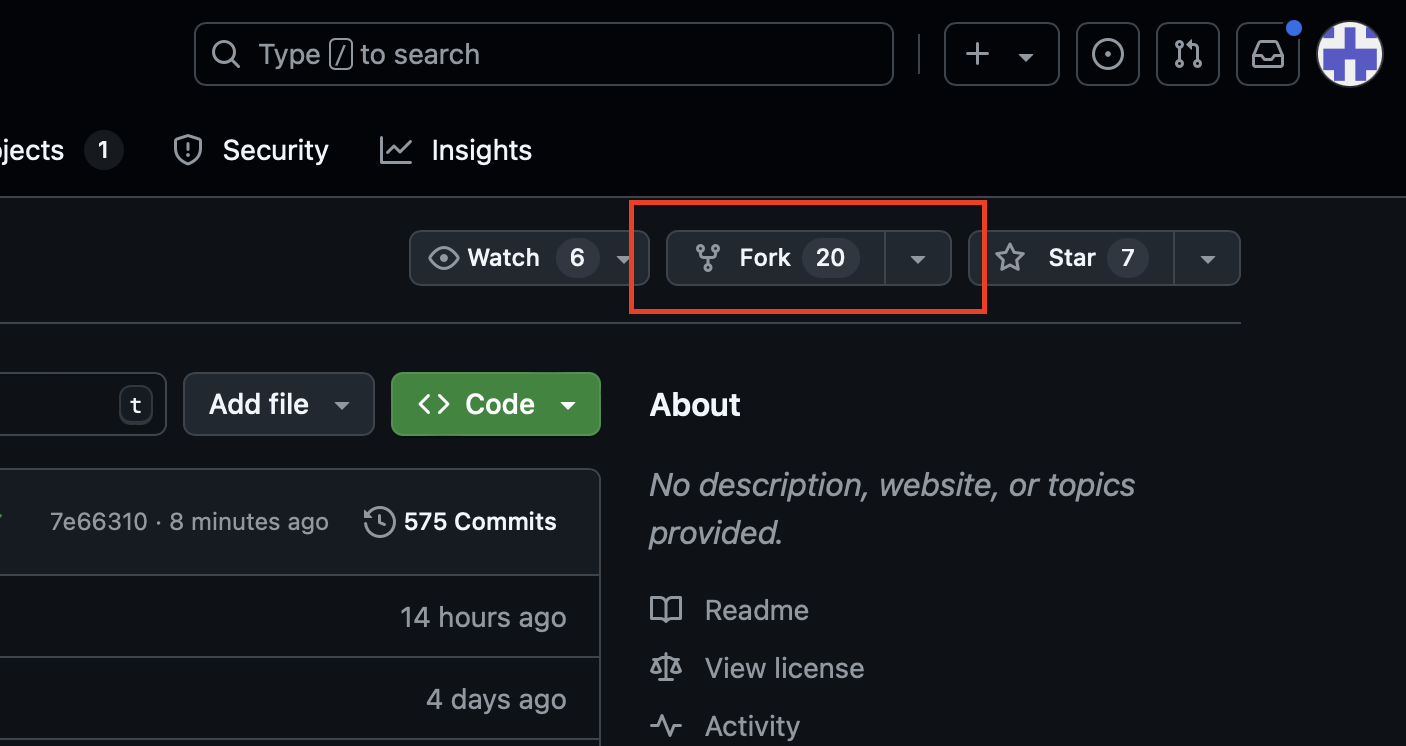
Make sure you are logged into your GitHub account, then navigate to the Tari Universe repo here. Look to the top-right corner of the screen for the Fork button.

Click on the drop-down and note the forks available. It should be blank. Click on the Create a new fork option to bring up the Create a new fork form.

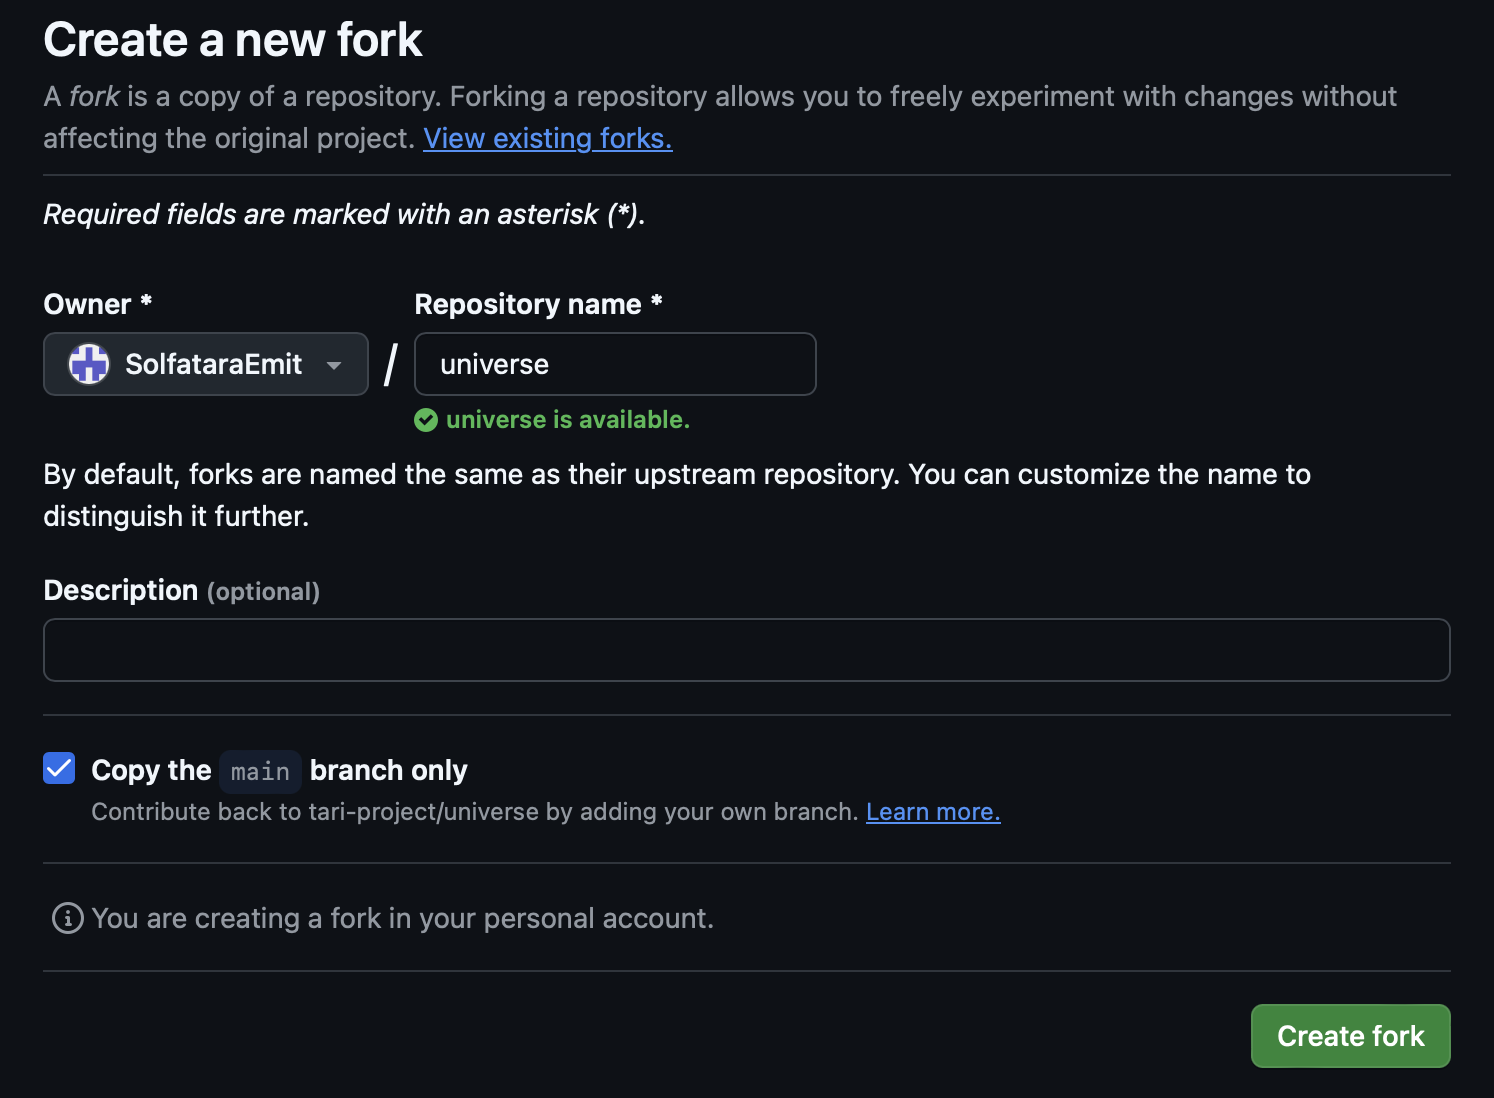
When filling out the form, keep the following in mind:
- The owner should be your GitHub username
- The repo name will be automatically filled in based on the repo name from the existing project. Leave it as is.
- You can provide a description of the project. Descriptions and comments are a good habit to get into, so fill this out with a suitable description.
- Make sure the Copy the main branch only option is checked. If you uncheck the option, you will copy all available branches from the existing repo.
Click the Create fork button to continue.
Once you’ve done so, there’ll be a brief delay while GitHub creates the fork, then you’ll be redirected to the new fork’s home page. Look at the top-left corner, and you should see something that reads [Your Username]/[Your Repo Name]. This is a good way to check that you are on the right repo. Additionally, you’ll see a message under the repo that reads, “forked from tari-project/universe” and is a quick indicator that you’re on your fork.
Step 6 - Cloning your repository in VS Code
Okay, so now that we have your GitHub credentials set up and available for VS Code, we’ll create a local repository - essentially a local version of the repo we created in GitHub - by cloning it.
This is a good time to start developing good practices around organizing your projects. We’d recommend creating a folder where you’d like to store your repository (call it something appropriate, like Repos or Repositories). Then, within that folder, create another folder called “universe-locale-project”. Make a note of their location, because this is where we’ll be cloning your repository to.
In VS Code, you have several options for cloning the repository, but the easiest way is to use the Command Pallete. Click on the View menu, and select “Command Pallete…”. You’ll also be able to see the shortcut here for your particular environment so you can use that to get to the Command Pallete in the future.
In the Command Pallete, Type “Git: Clone” and select the Git Clone option from the drop-down. You’ll you’ll need to select a folder to put the local repository in.

Next, enter the repository URL directly in the Command Pallete. In your forked GitHub repository, look to the top-right of the your project and locate the “Code <>” button, colored green. Clicking on the button will open a dialog box with the option to clone the repository via three methods. Select the SSH tab, and copy the string. It should look like git clone git@github.com:yourusername/yourrepo.git
Now, navigate to the folder you created earlier and select it, then click the “Select as Repository Destination” button.
This will proceed to clone the repository. Once completed, you will be asked if you wish to open the project. When you do so, you’ll also receive a warning regarding the repository from VS Code.
Because you are dealing with code that can be executed as a normal application, this is informing you of the risks in doing so. Please select the “Yes, I trust the authors” button”.
If you are uncomfortable with trusting the repo, you can select the “No, I don’t trust the authors”, which result in VS Code accessing the folder via Restricted Mode (you can read up more about this here).
While doing so should not have a negative impact, note that this guide has been written with the assumption that you trust the project, so some functions or steps may not match up to your experience.
Once cloned, you will also be asked to install some recommended extensions in VS Code. These are not required for this guide, so you can skip installing them.
Step 7 - Adding the original Tari Universe Repository to your remotes.
We also need to add the original Tari Universe repository to your project. This is important because when you eventually start committing your new locale to your project, you will want to be able to feed those changes as recommendations to be incorporated into the main project.
This is commonly referred to as the Upstream repository - this represents the original project to which changes are made and releases are generated.
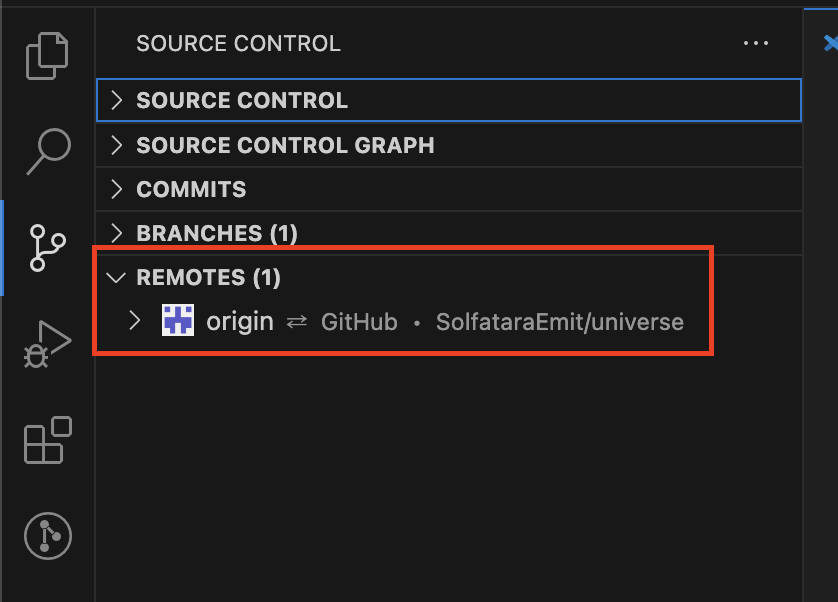
In VS Code, select the Source Control tab (this can be accessed via the View menu), and open up the Remotes panel. You should see only one item, called origin, in the list.

To add the Tari Universe repository as the upstream remote, hover over the Remotes header, and then click on the plus icon. You will be asked to provide a name for the remote repository - call it “Upstream”. S Next, you will require the Tari Universe URL from the main project. Go to https://github.com/tari-project/universe and copy the repository’s URL string in the same manner described in Step 5. Paste this URL into the field to add the repository, then select the “Add Remote and Fetch” option. You will now see the Tari Universe in your list of remote repositories.

You’re Done!
You should now have your environment set up to start working on Tari’s various projects. Check out Tari’s main page on GitHub to explore some of your options. We’re excited to see what you can bring to the table.